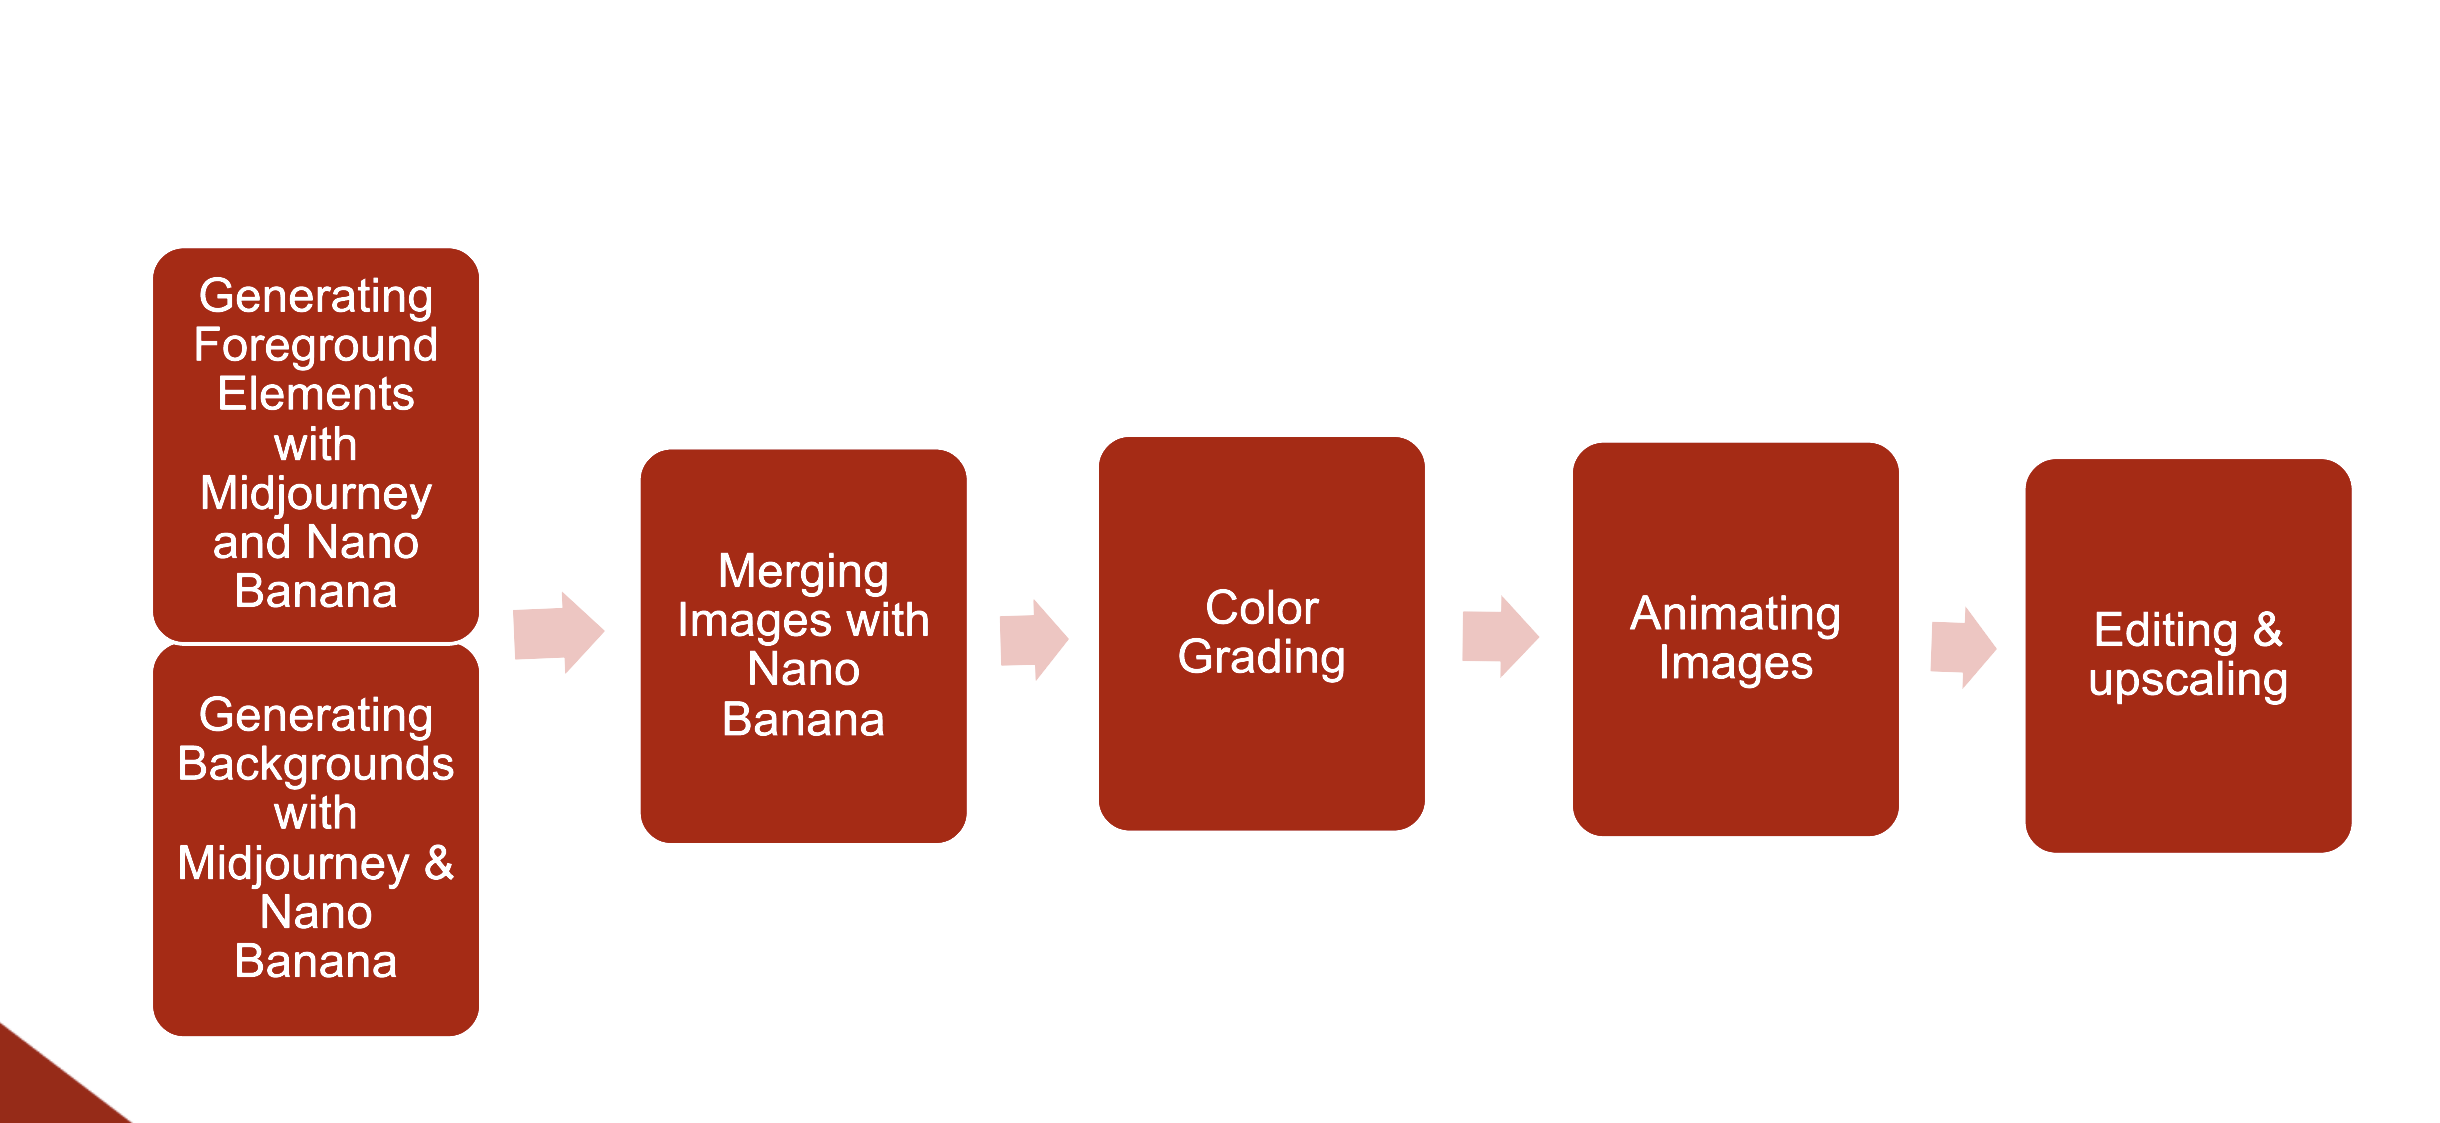
Step 01 – Foreground Element Generation
The production started by generating all foreground elements separately from the backgrounds. This included characters, hands, body parts, landscape fragments, and other visual assets required throughout the film.
Separating foreground and background generation proved to be one of the most important workflow decisions. When a complete scene is generated as a single image, modifying a character or object at a later stage often causes the entire image to change. Background elements, lighting conditions, composition, or environmental details may shift unexpectedly. By generating assets independently, individual elements can be replaced, refined, or regenerated without affecting the rest of the scene.
This approach provides significantly more control over:
- Character consistency
- Shot-to-shot continuity
- Composition
- Camera framing
- Visual style
- Iterative revisions
Tip: For a comprehensive overview of prompting techniques and best practices, consult the Creative AI Lab tutorial on prompting: https://www.creativeailab.be/the-basics-of-prompting/
Best practice: Generate multiple variations
Even when the prompt remains identical, small changes in composition, scale, or blending may occur. Generating several variations (min 4) and selecting the strongest result is often faster than attempting to force a perfect result in a single generation.
Character Creation
Character development started with the creation of a reference character. Rather than immediately generating video, a stable visual identity was first established through a sequence of image generation steps.
The process consisted of the following stages:
1. Character Definition
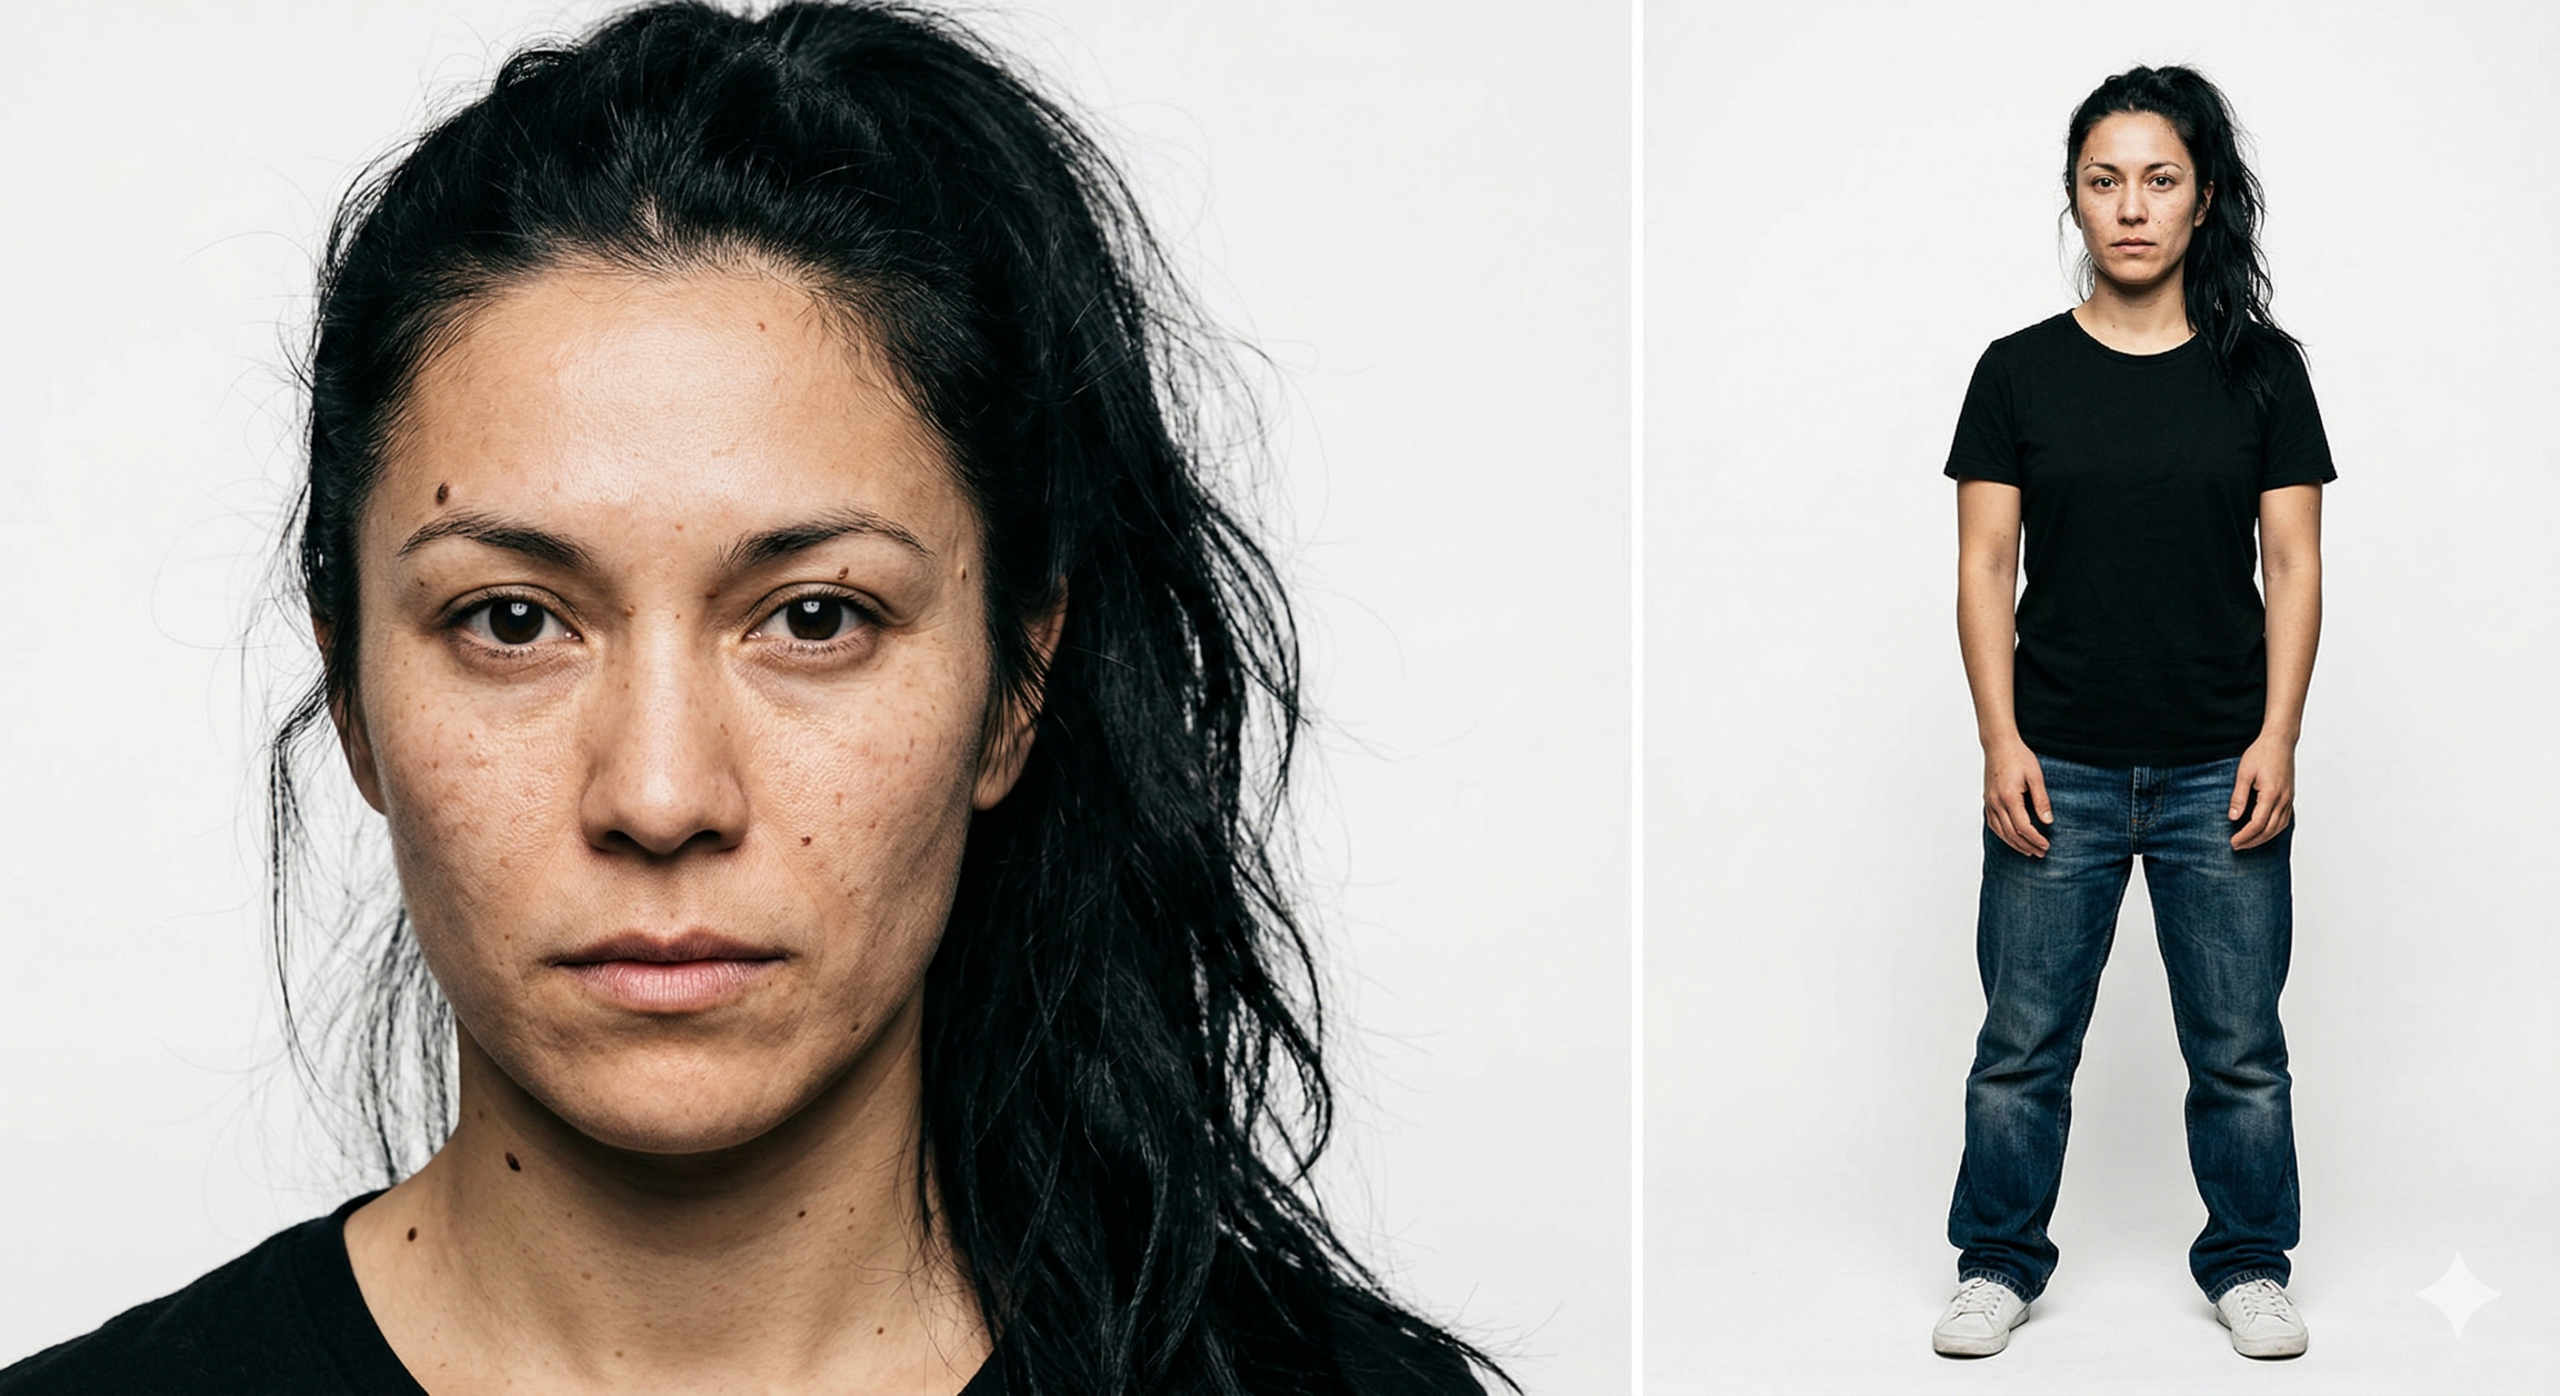
A detailed portrait and full-body version of the character were generated side by side.
Example prompt:
“Side by side photo of a close-up face and full-body character design of a 25-year-old woman with visible skin pores, long black hair in a sloppy ponytail, brown eyes, multiple facial moles, and no make-up. The face shows natural imperfections such as laugh lines, pigmentation spots, and skin texture. On the left, a neutral intense expression looking directly at camera. On the right, a full-body view wearing a black T-shirt, jeans, and sneakers. Photographic style on a neutral background.”
The objective at this stage is not artistic perfection, but identity definition. Facial structure, age, clothing style, proportions, and visual characteristics should be clearly established.
Best Practice: Embrace Imperfections
Many AI-generated characters appear artificial because they are often generated with overly perfect skin, symmetrical features, and idealized facial proportions. To create more believable and human characters, it is recommended to explicitly include natural imperfections in your prompts.
Examples include:
- Laugh lines
- Skin pores
- Pigmentation spots
- Facial moles
- Freckles
- Minor asymmetries
- Subtle wrinkles
- Uneven skin texture
- Under-eye details
These details often have a surprisingly large impact on perceived realism. Human faces are rarely perfect, and introducing small imperfections helps reduce the synthetic appearance that is often associated with AI-generated imagery.
The same principle applies to clothing, hair, and environments. Small irregularities and imperfections generally result in more convincing and believable visual outputs.
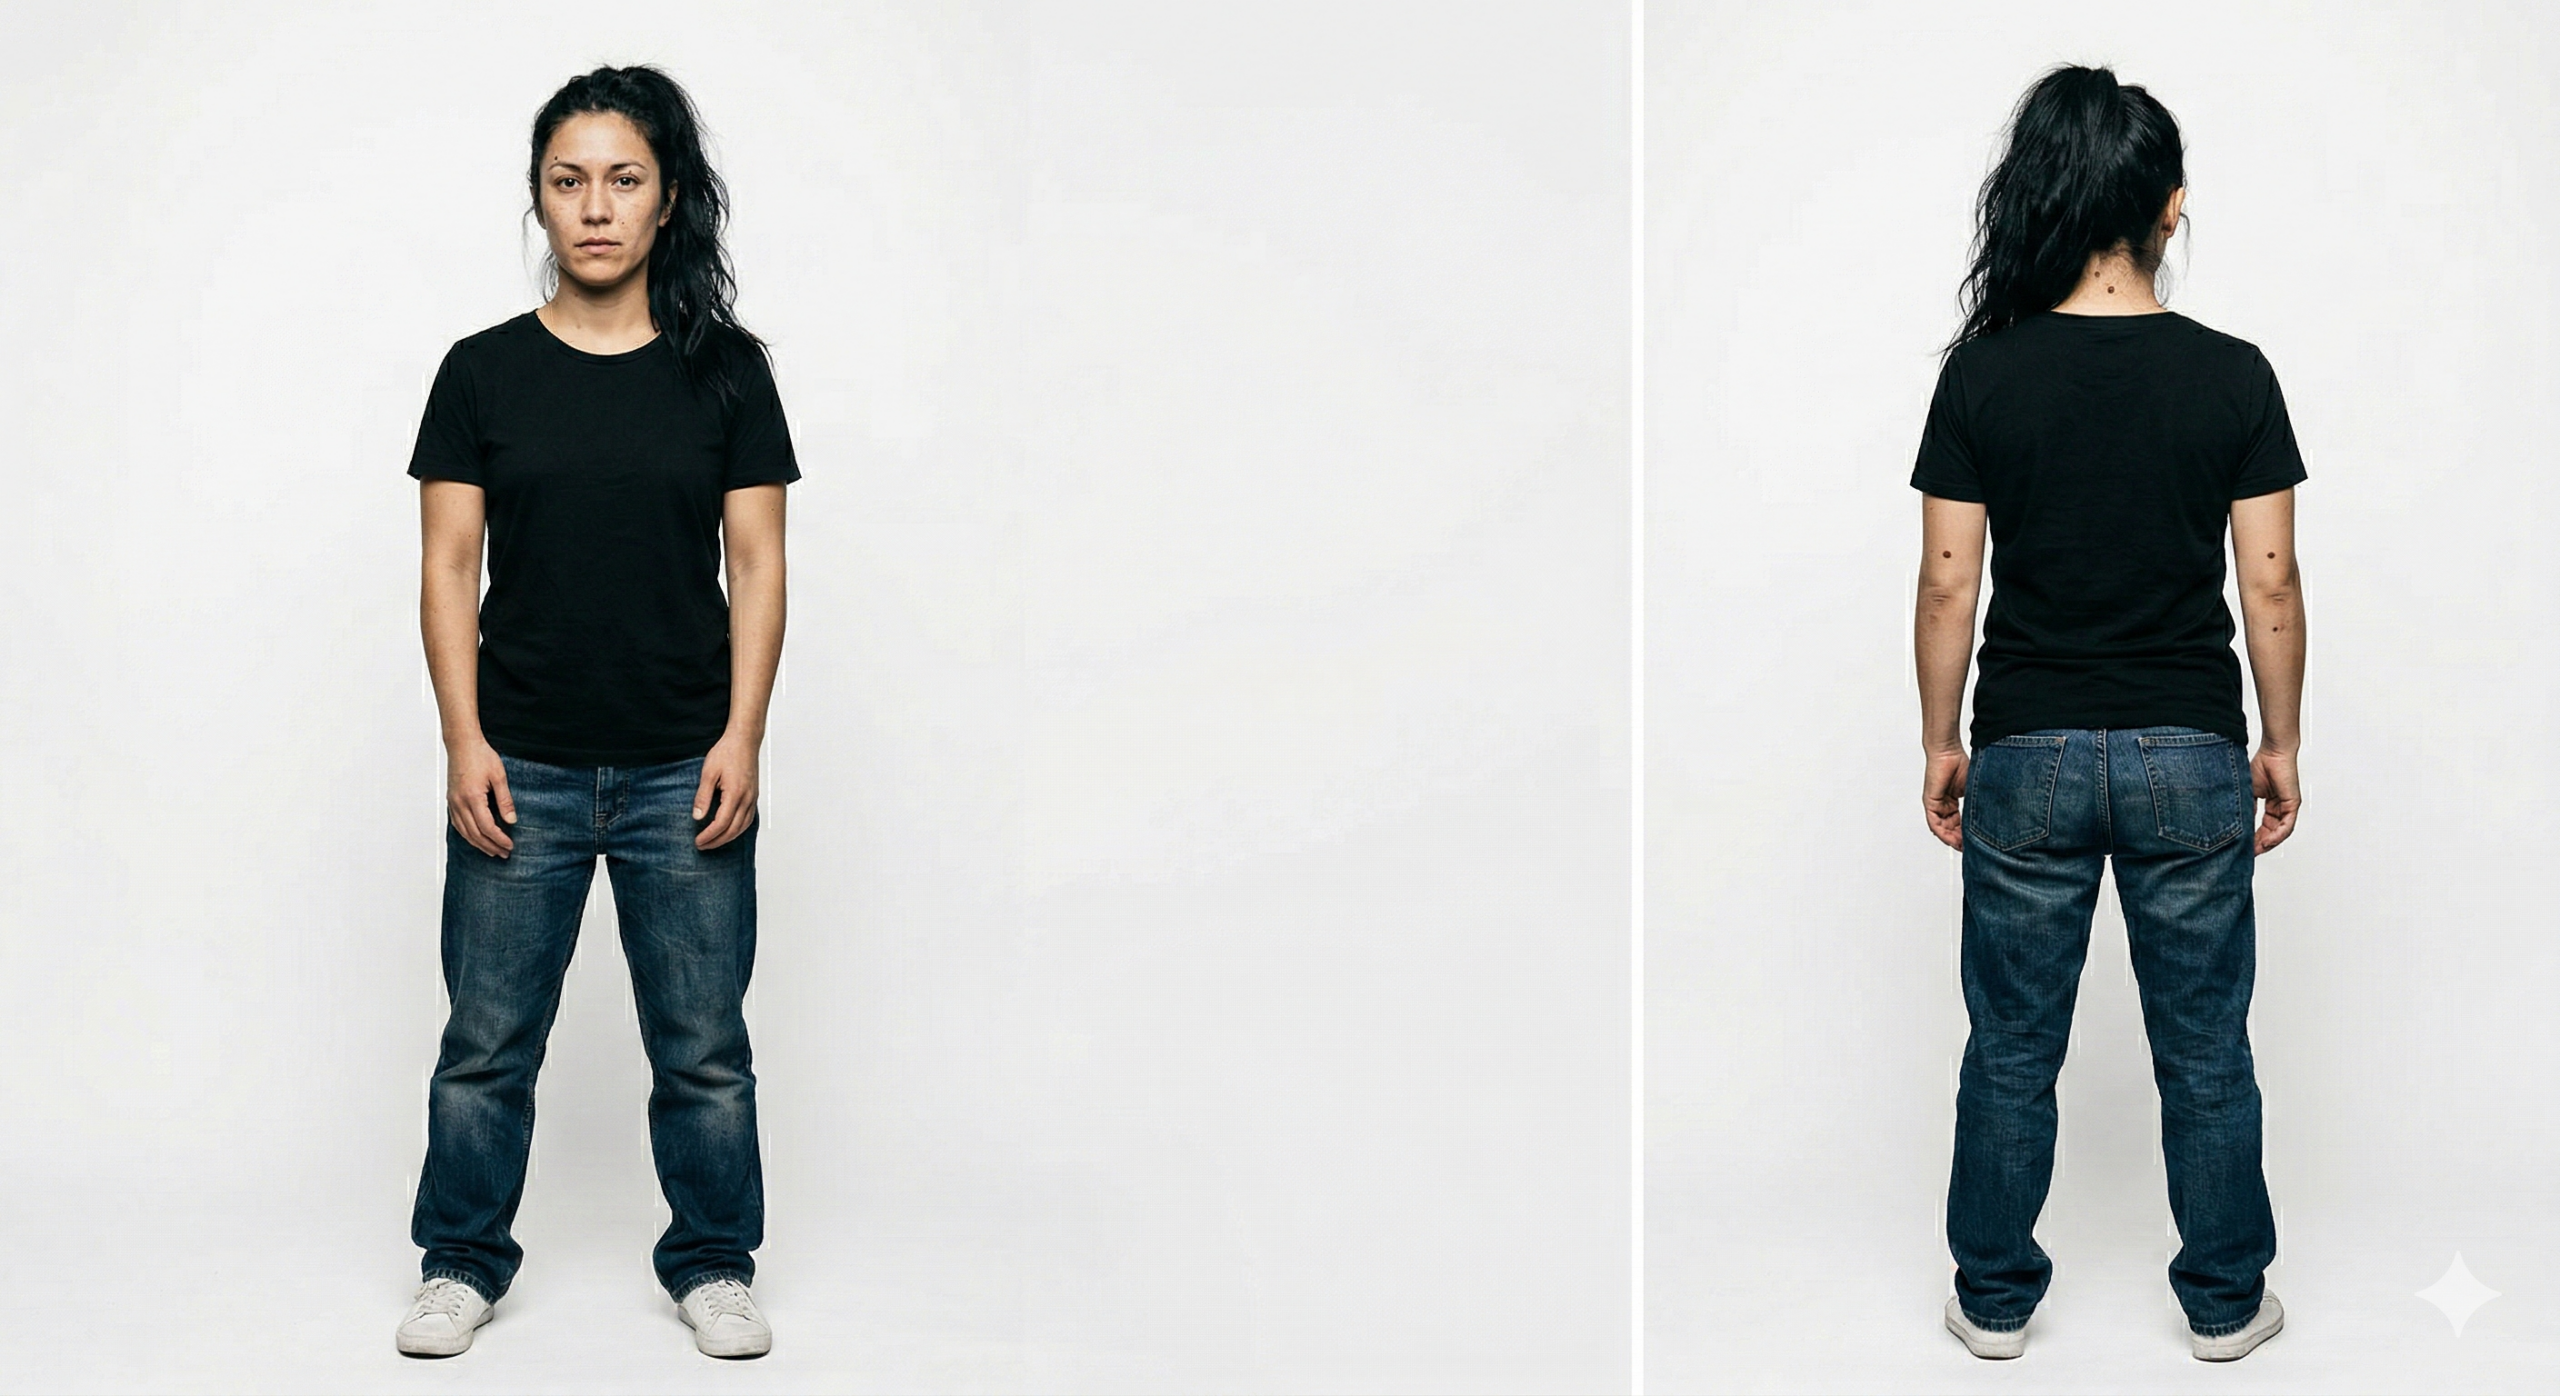
Once a satisfactory character was obtained, additional views were generated. These additional angles help maintain consistency when later generating different shots and perspectives. They also provide visual information that may not be visible in a single portrait image, such as tattoos, scars, accessories, clothing details, body proportions, or other distinguishing features. In practice, it is often easier and more reliable to show these characteristics through reference images than to describe them in text prompts. Providing visual references reduces ambiguity and helps the model maintain consistency throughout the production process.
Example prompt:
“Create a front and back view of the same character.”
3. Character Sheet Creation (optional)
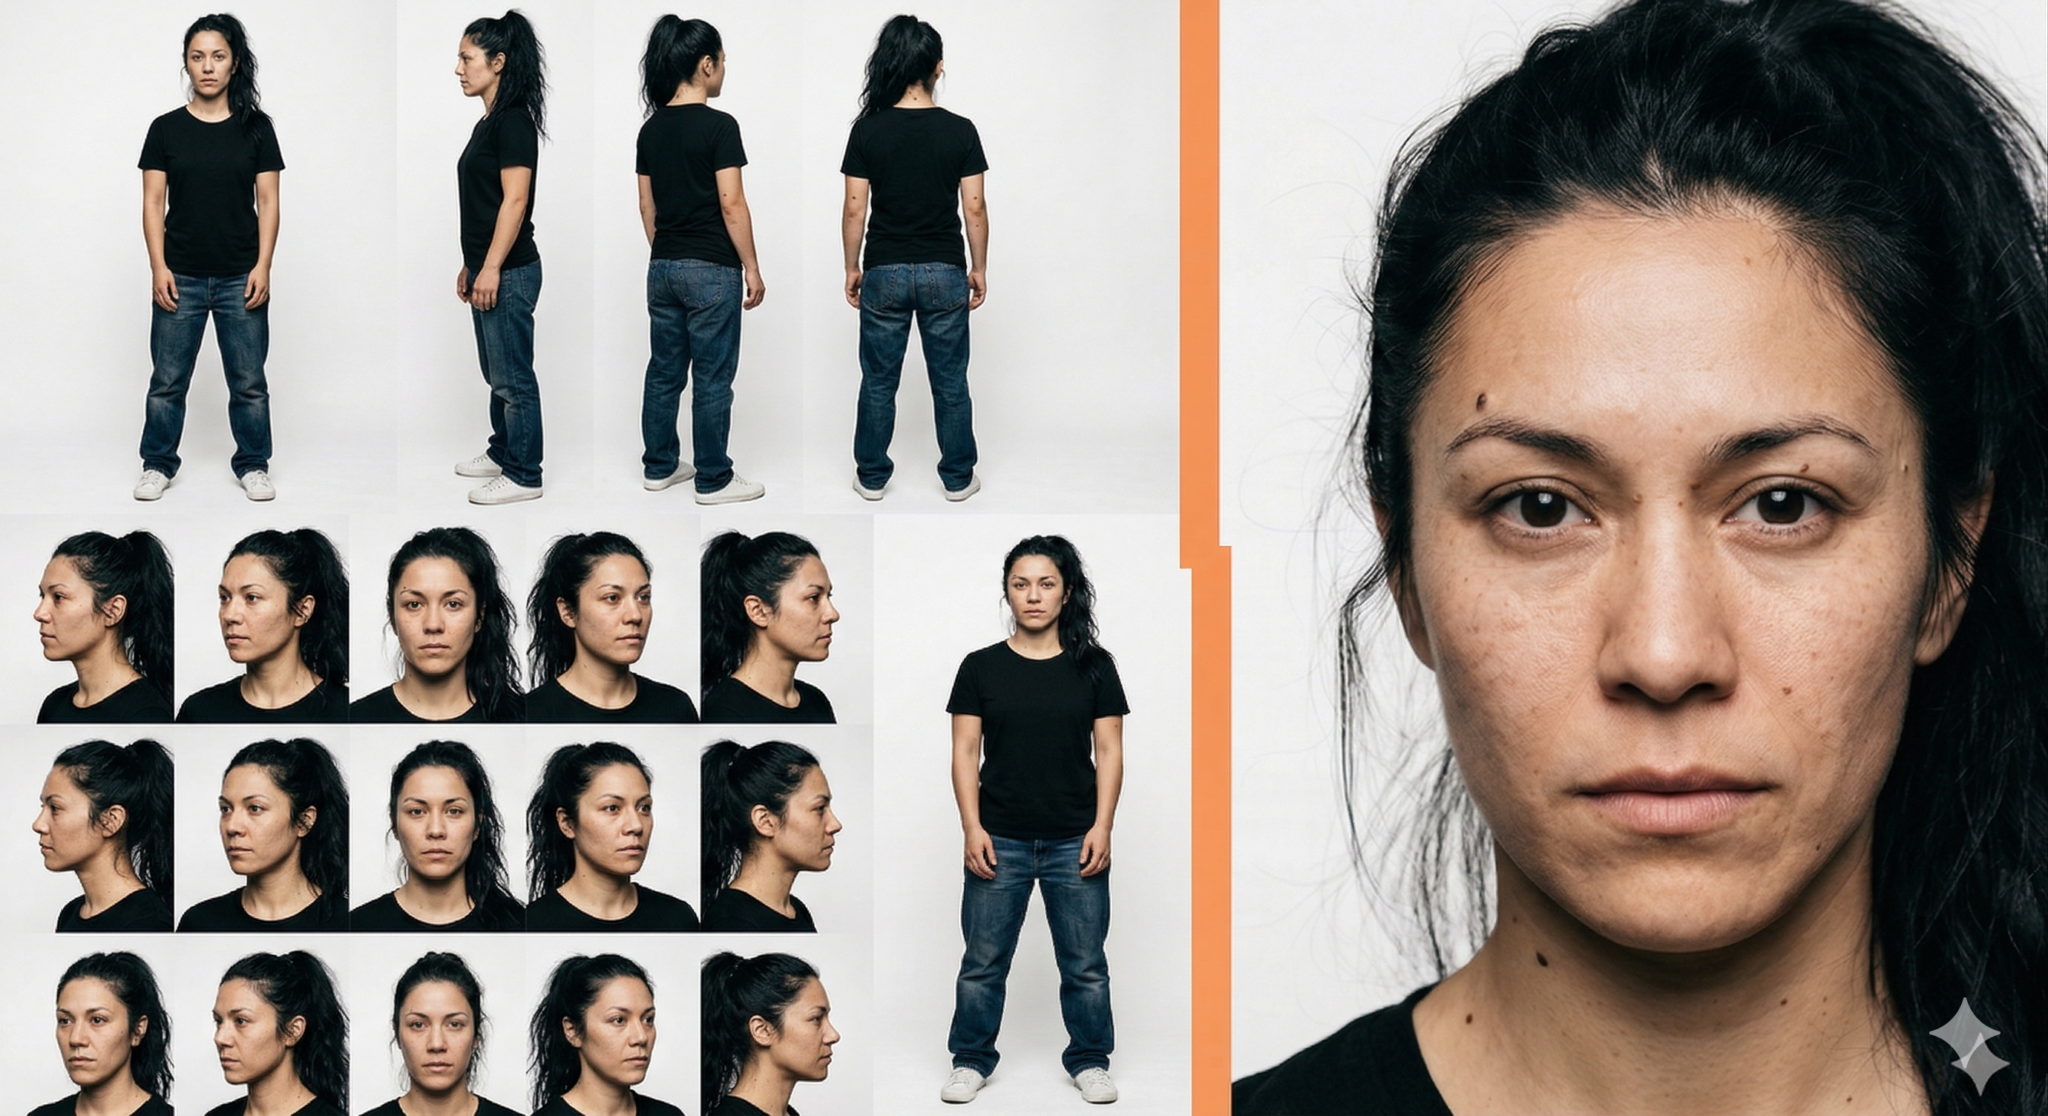
You can also create a character sheet if multiple views of the character are required. For this short film, a full character sheet was not necessary. As a best practice, it is recommended to generate at least one reference image for every camera angle in which the character appears throughout the video. This provides enough visual guidance to maintain consistency while avoiding unnecessary generations.
Example prompt:
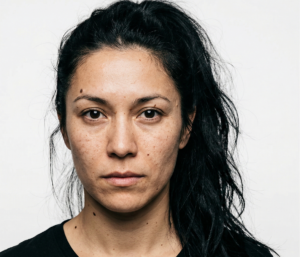
“Create a character sheet of the woman in image 1 and image 2. Include multiple facial expressions, front view, side view, back view, and full-body references.”
Image 1 & 2:
Result:
4. Emotion Reference Sheet (Optional)
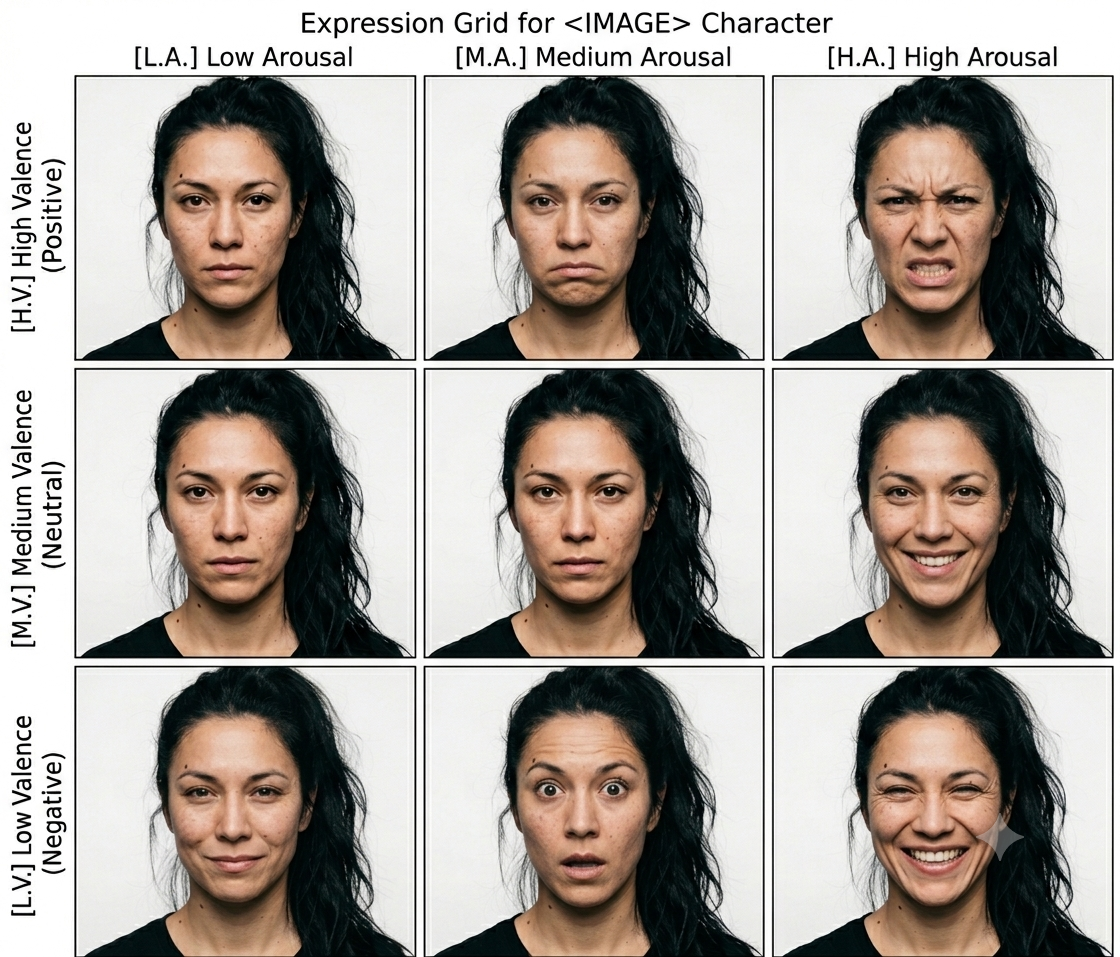
For productions that require a wider emotional range, additional expression references can be generated. For short productions this step is often unnecessary. However, for longer narratives or projects involving multiple emotional transitions, expression sheets can significantly improve character consistency across shots.
Rather than describing emotions using traditional labels such as “happy”, “sad”, or “angry”, some models respond well to emotion dimensions such as valence and arousal.
- Valence describes how positive or negative an emotion is.
- Arousal describes the intensity or energy level of an emotion.
Examples:
- High valence, high arousal → excitement, joy, enthusiasm
- High valence, low arousal → contentment, calmness
- Low valence, high arousal → fear, anger, stress
- Low valence, low arousal → sadness, fatigue, resignation
Generating a set of emotional reference images can help maintain consistency when creating close-ups, dialogue scenes, or character reactions.
Example prompt:
“Create a character expression sheet of the same character showing a range of emotional states. Include low, medium, and high valence expressions combined with low, medium, and high arousal levels. Maintain the exact same facial structure, age, lighting, hairstyle, clothing, and visual style.”
“Generate multiple separate versions of the person in the attached reference image (hereinafter referred to as THE_SUBJECT); replicate THE_SUBJECT’S appearance with 100% accuracy including facial features, hairstyle, skin tone, proportions, and overall appearance. Divide the image into a 5×4 grid (5 columns, 4 rows) with equal sized sections, each containing a different image of the THE_SUBJECT’S face as if captured by a professional photographer during fashion photoshoot using perfect lighting and composition to portray THE_SUBJECT in high fidelity. THE_SUBJECT should be in front of a neutral gray background. The final image should contain 20 distinct and different shots in total. Each image should have slight differences in gaze, angle of the face and emotion or expression. Explore the full range of human emotions; do not repeat the same expression or angle. Always vary the expression and angle of the face by tilting or turning the head and changing the facial expression. The overall aesthetic should be a professional photoshoot for a top-tier magazine.”
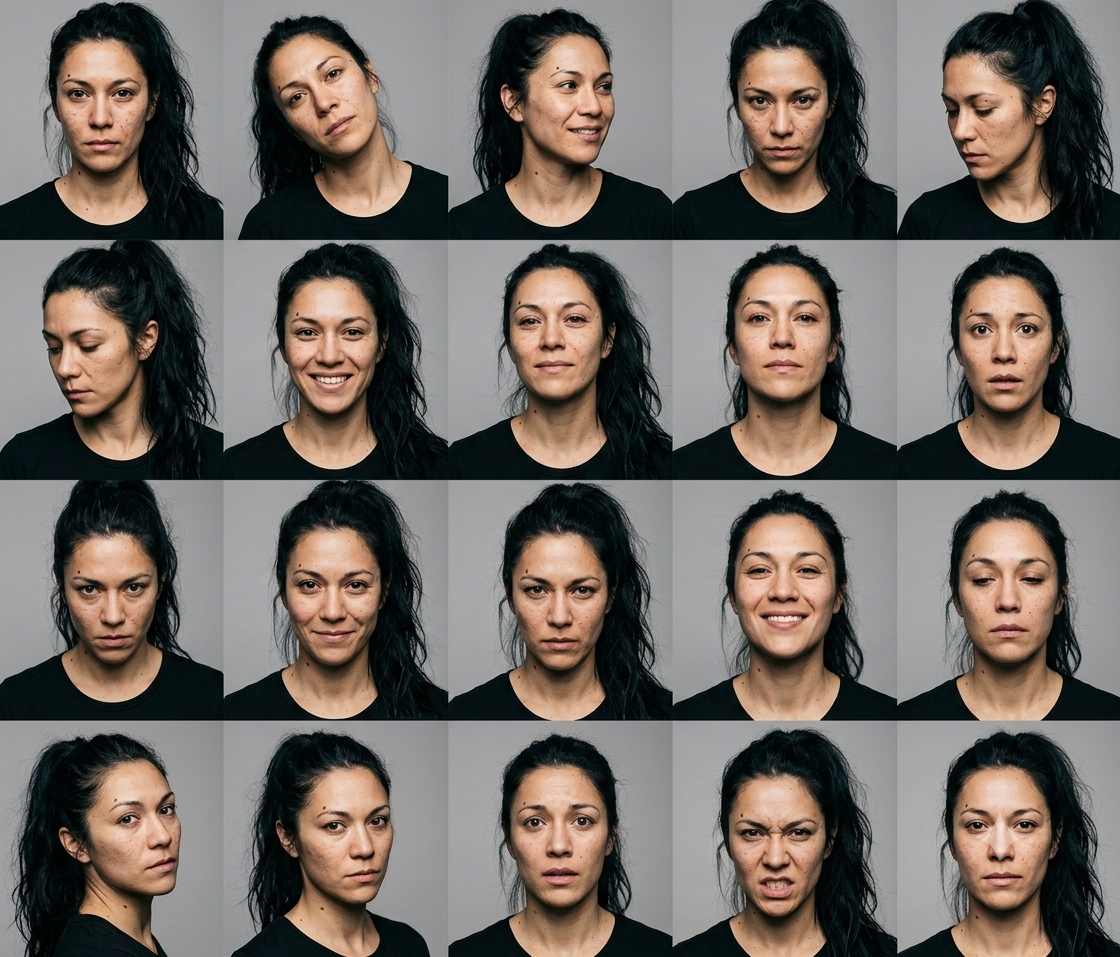
Best Practice: Define the emotional range of the character before generating expressions.
Many AI-generated characters feel artificial because emotions are generated randomly or independently from the story. Before creating an emotion sheet, it is recommended to map the emotional journey of the character throughout the video.
Instead of generating every possible emotion, focus on the emotions that are actually required in the final sequence. For example: neutral, concerned, curious, afraid, relieved, or joyful.
When selecting reference expressions, look for subtle and natural performances rather than exaggerated emotions. Real people often communicate emotion through small changes in the eyes, mouth, eyebrows, and facial tension. Using realistic reference photography helps create more believable characters and reduces the artificial appearance often associated with AI-generated faces.
Whenever possible, collect visual references from films, portrait photography, or acting reference libraries and use these as inspiration when designing the emotional range of the character.
Step 02 – Background Generation
The environmental backgrounds were generated based on the storyboard and camera plan.
Rather than generating each shot independently, the objective was to create the illusion of a single coherent world that could be viewed from multiple camera positions. This approach significantly improves continuity between shots and reduces visual inconsistencies that often occur when each image is generated separately.
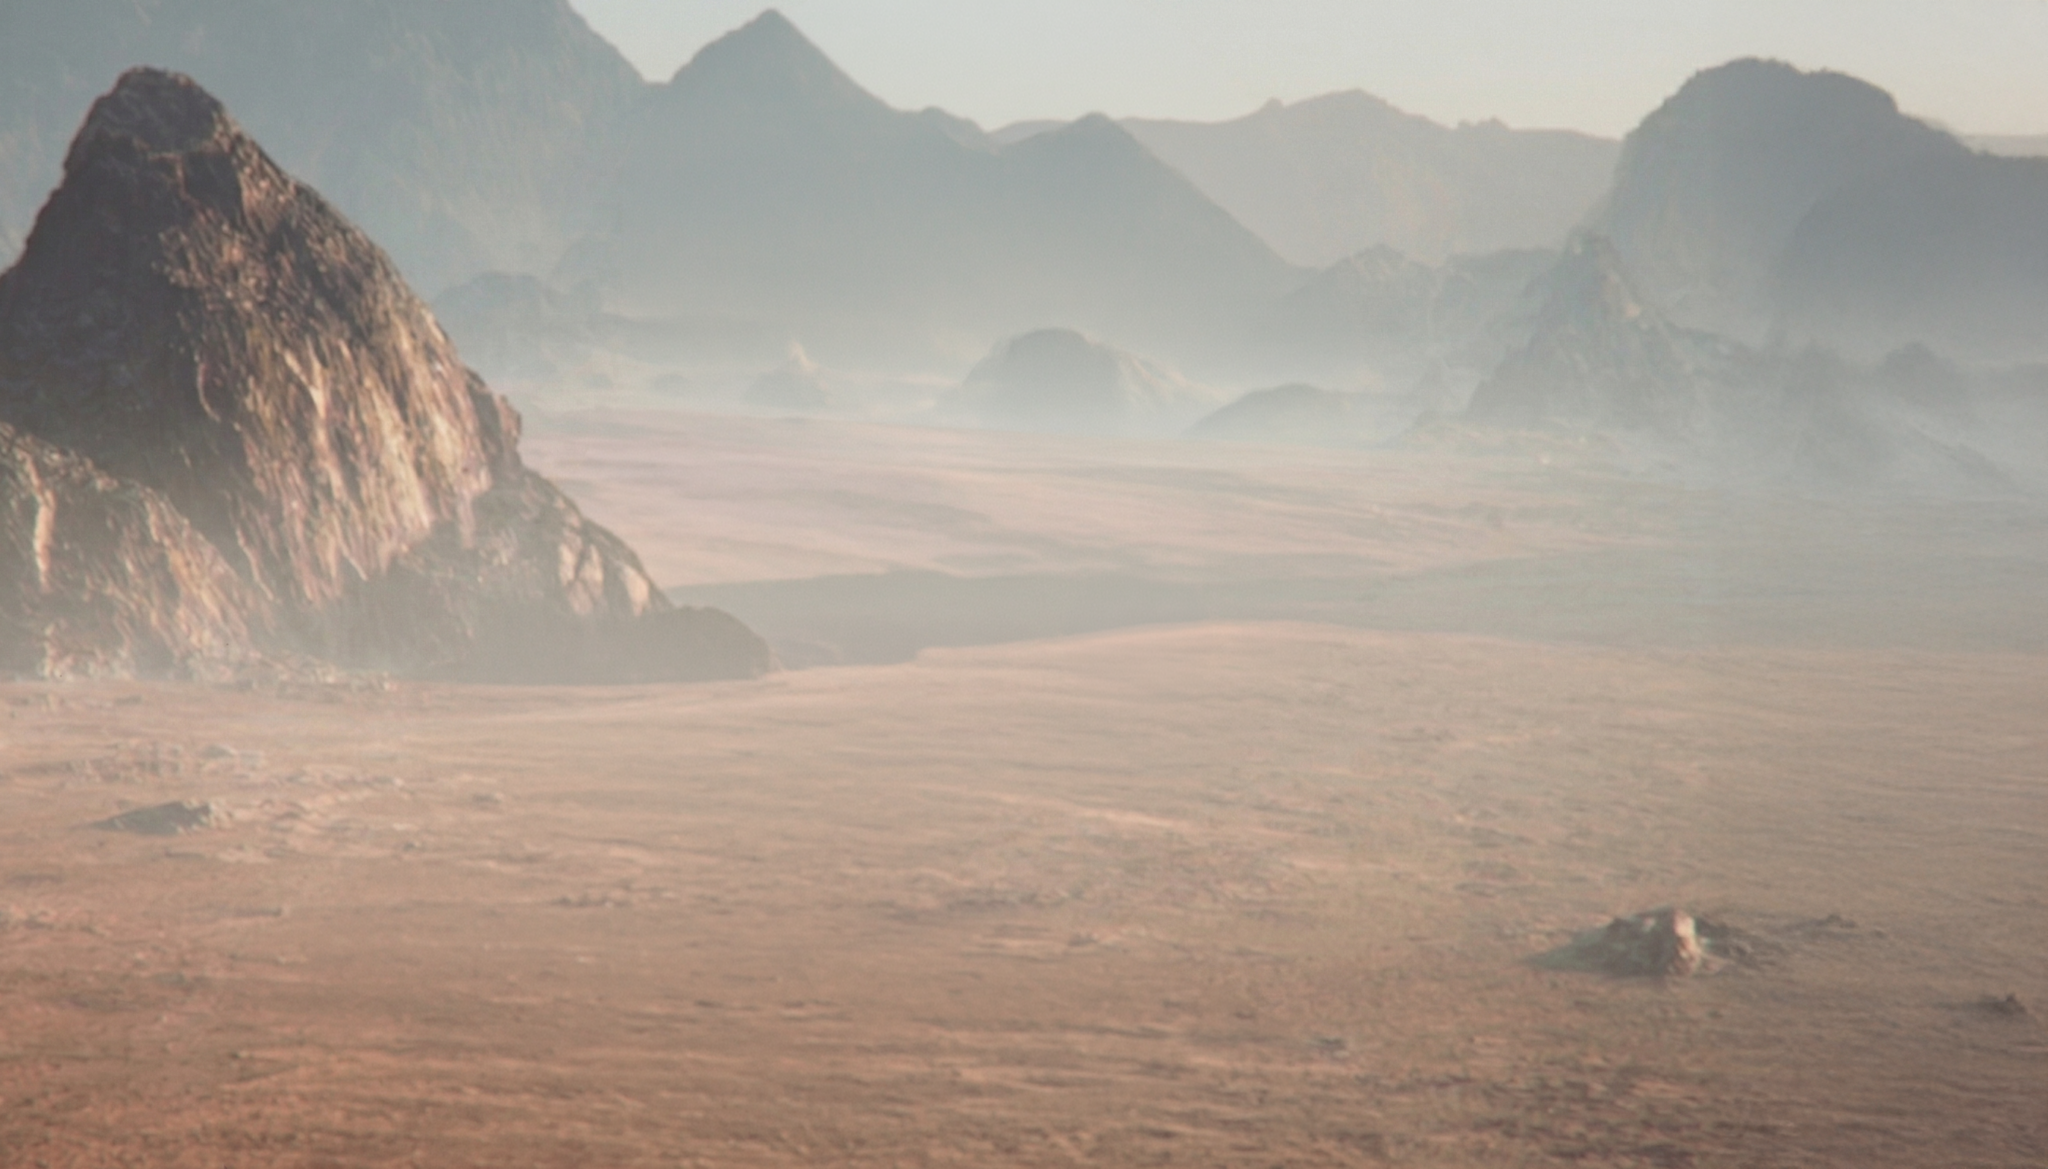
1. Concept Development
The process started with the creation of a master environment image using Midjourney.
At this stage, the focus was not on generating every individual shot, but on establishing:
- overall landscape design
- atmosphere
- lighting conditions
- color palette
- environmental scale
The selected image became the visual foundation for all subsequent background generation.
2. Camera Angle Generation
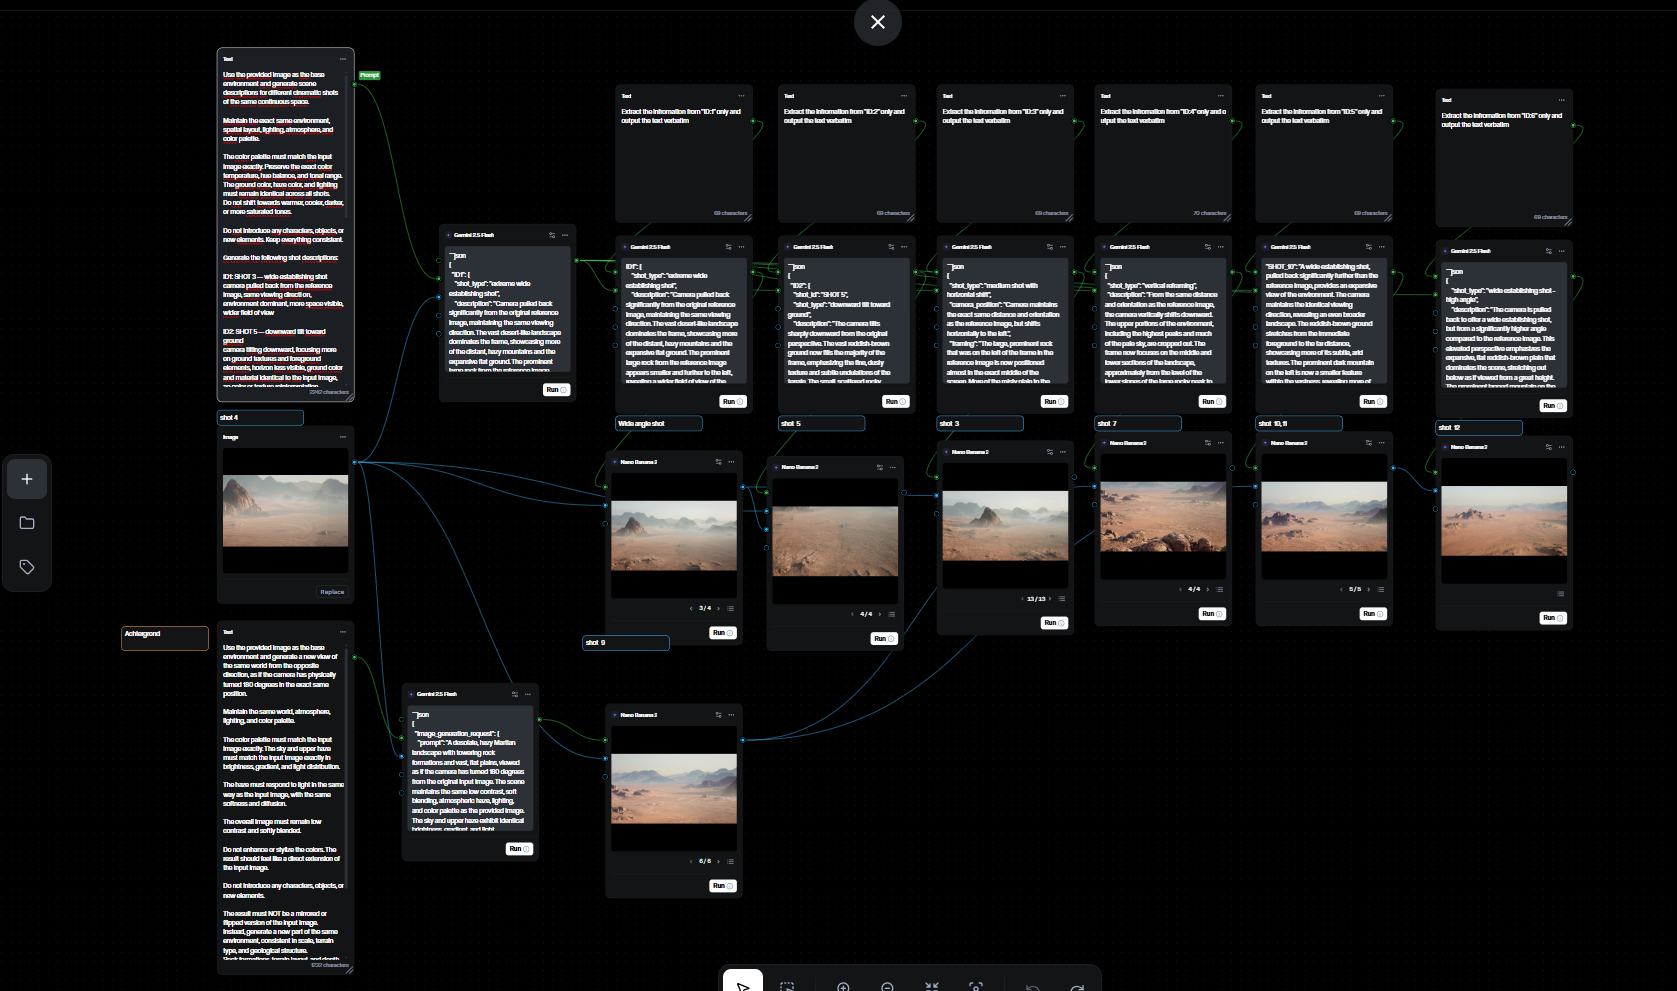
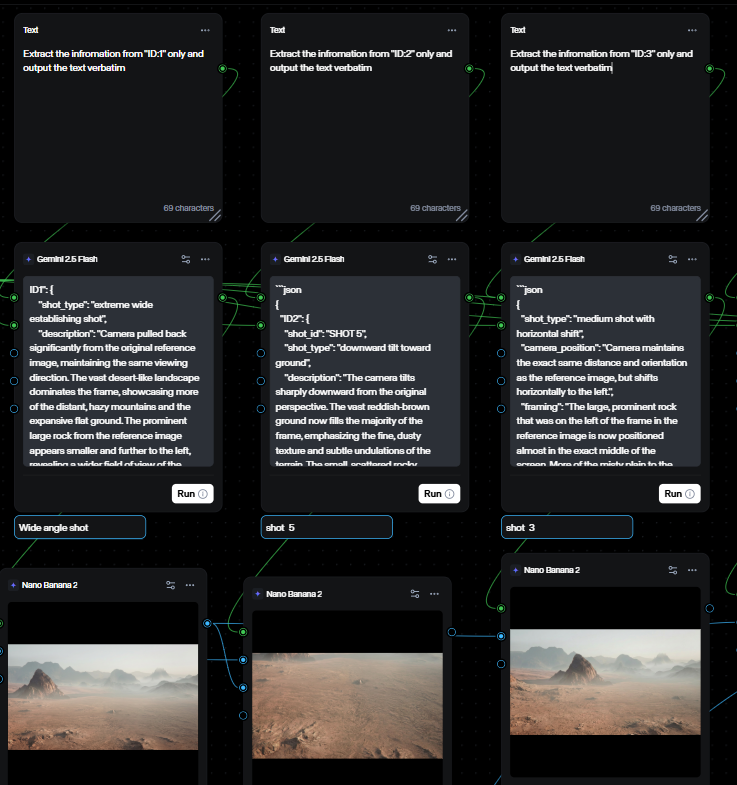
Once a master environment image was selected, a workflow was used to generate additional viewpoints from the same environment. Although this project used Runway Workflows, similar workflows can be implemented in tools such as Flora, Freepik, or other visual pipeline builders.
The main advantage of workflow-based systems is that they make it possible to build a generation pipeline once and reuse it throughout the entire production. Prompts, references, and parameters can be adjusted dynamically, while all outputs remain visible and comparable in a single workspace. This greatly simplifies iteration and allows rapid exploration of multiple camera angles and scene variations.
For this workflow, the process started with the master environment image generated in the previous step, combined with a prompt describing the desired camera movements and viewpoints within the same environment.
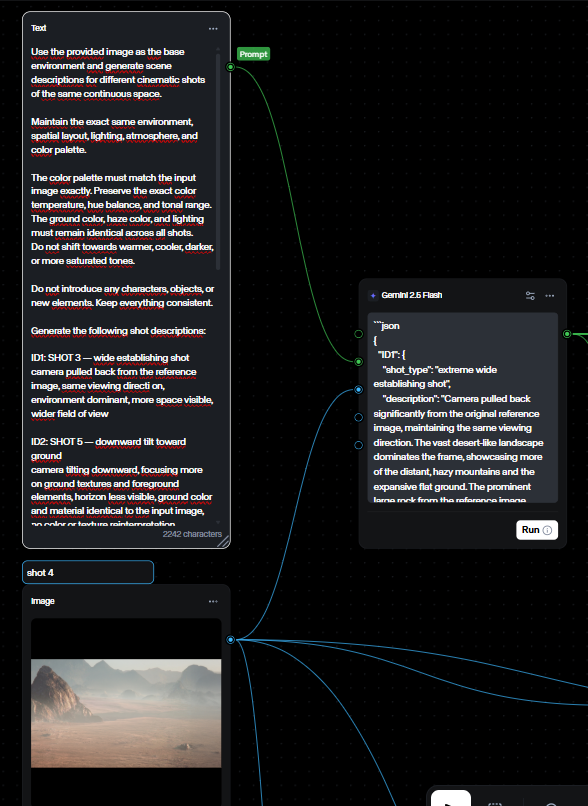
Example text prompt:
Use the provided image as the base environment and generate scene descriptions for different cinematic shots of the same continuous space.
Maintain the exact same environment, spatial layout, lighting, atmosphere, and color palette.
The color palette must match the input image exactly. Preserve the exact color temperature, hue balance, and tonal range.
The ground color, haze color, and lighting must remain identical across all shots.
Do not shift towards warmer, cooler, darker, or more saturated tones.
Do not introduce any characters, objects, or new elements. Keep everything consistent.
Generate the following shot descriptions:
ID1: SHOT 3 — wide establishing shot camera pulled back from the reference image, same viewing directi on, environment dominant, more space visible, wider field of view
ID2: SHOT 5 — downward tilt toward ground
camera tilting downward, focusing more on ground textures and foreground elements, horizon less visible, ground color and material identical to the input image, no color or texture reinterpretation
ID3: ….
Each description should clearly describe the camera position, framing, and visible parts of the environment.
The environment must remain spatially consistent across all shots, as if the camera is moving within the same scene.
Output JSON format, seperated into “ID:#”1-5.
After defining the desired camera positions, the prompt was passed through an LLM (Gemini Flash in this project). The LLM transformed the natural language camera instructions into a structured JSON format while simultaneously refining the descriptions for image generation. This ensured that each shot contained consistent information regarding framing, camera position, environmental continuity, and visual constraints before being forwarded to Nano Banana.
Once the JSON structure was created, each shot identifier (ID1, ID2, ID3, etc.) was extracted individually and passed to Nano Banana together with the original environment image.
The original environment image acted as an anchor, while the extracted shot description instructed Nano Banana how the virtual camera should be positioned relative to that environment.
This approach made it possible to generate multiple viewpoints from a single master environment while preserving consistency in:
- lighting
- atmosphere
- color palette
- environmental scale
- geological structure
Each generated image was reviewed and compared against the storyboard before being selected for the final sequence. Multiple variations were often generated for a single shot, allowing the strongest result to be chosen before moving to the next stage of the pipeline.
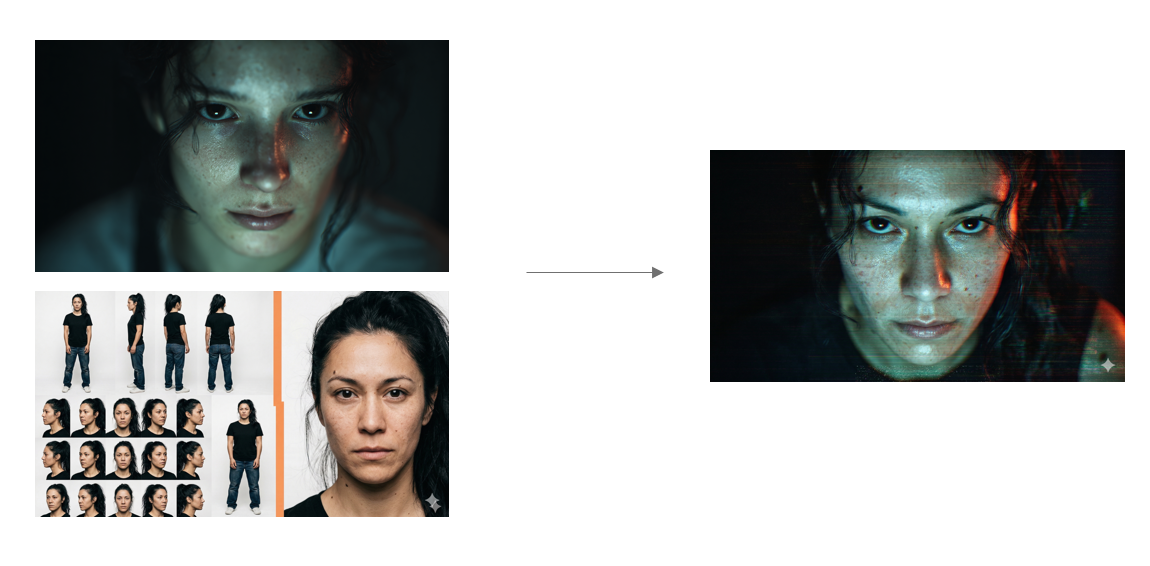
Step 03 – Image Compositing
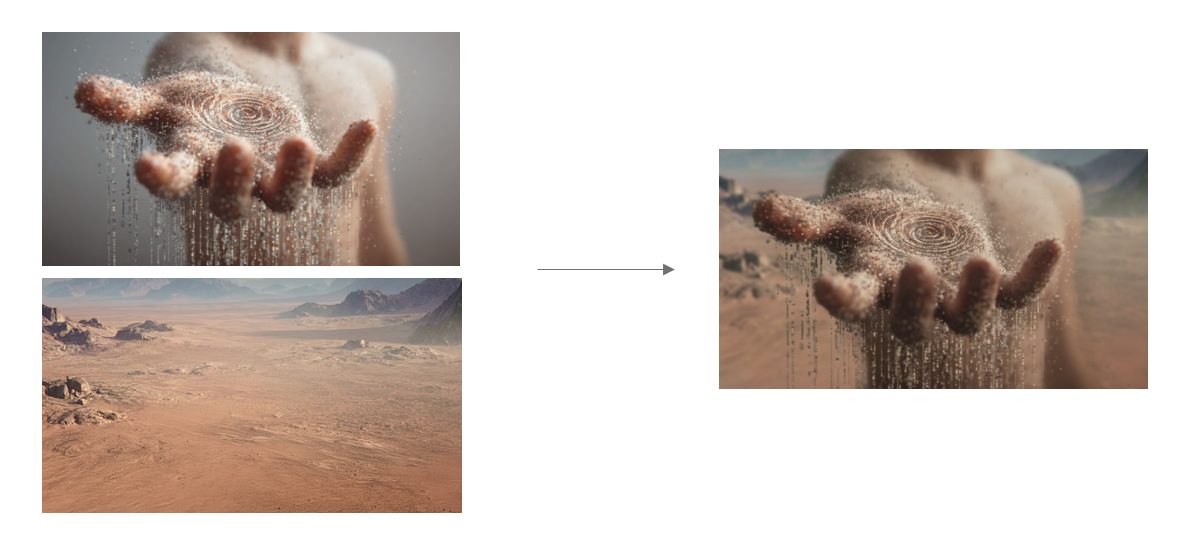
The generated foreground and background elements were combined using Nano Banana.
Several iterations were required to achieve convincing integrations and ensure that all elements appeared to belong to the same world.
Best Practices
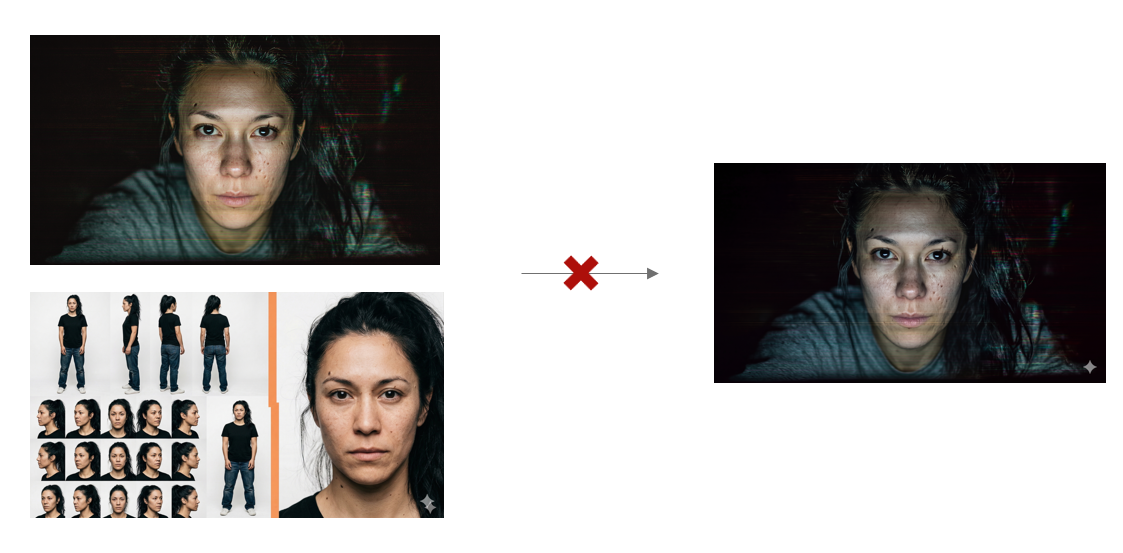
Maintain visual separation between source images
Nano Banana generally performs better when the images being merged contain clearly distinct information. When two source images are visually very similar, the model may struggle to determine which elements should be preserved and which should be modified.
For example, merging two characters with similar facial features, hairstyles, or clothing can sometimes cause the model to unintentionally alter the character identity.
Align visual style before compositing
The closer the source images are in terms of lighting, atmosphere, and color palette, the more convincing the final composite will be.
If one image contains warm lighting and the other contains cool lighting, Nano Banana often needs to make aggressive adjustments to reconcile the two. This can result in unnatural colors, inconsistent shading, or elements that appear disconnected from the environment.
Whenever possible, harmonize lighting and color grading before compositing.